


You know the feeling. Mincing is done, seasoning is right, the bench is already crowded, and the sausage run still has to happen before customers walk in or the next production task starts. Then the filler fights you. Casings split. Mix smears. One batch looks tight and clean, the next looks soft and patchy. At that point, the sausage filler machine isn't just another piece of equipment on the bench. It's the machine that decides whether the day runs smoothly or drags.
In a butcher shop, smallgoods room, abattoir support area, or hospitality prep kitchen, the right filler does more than push meat into casing. It helps control consistency, limits waste, reduces rework, and makes cleaning at the end of the shift less painful. That matters in Australia, where labour is expensive, hygiene expectations are high, and every avoidable delay shows up in margin.
Table of Contents
- Your Sausage Filler Is Your Most Important Asset
- Choosing Your Engine A Guide to Filler Types
- Key Specs Materials and Food Safety Construction
- Installation Casing Compatibility and Workflow
- The Real Cost of Ownership Cleaning and Maintenance
- Common Problems and Smart Troubleshooting
- Calculating ROI and Choosing Essential Accessories
Your Sausage Filler Is Your Most Important Asset
A lot of operators treat the filler like a support machine. It isn't. If your sausage filler machine is inconsistent, every problem shows up downstream. You see it in product appearance, in casing failures, in slower linking, and in customer complaints when sausages don't cook evenly or hold their shape.
That's why experienced butchers don't judge a filler by whether it can stuff a casing at all. They judge it by whether it fills cleanly, repeats the same result batch after batch, and holds up through a wet, messy, fast-moving production day.

Why the filling step decides quality
A sausage can start with good trim selection, proper fat ratio, a clean grind, and balanced seasoning. You can still ruin it at filling. Poor pressure control traps air. Rough handling warms the mix. Bad nozzle matching puts stress on the casing. In the end, the customer doesn't care which step failed. They just see a sausage that looks second-rate.
The core mechanism behind the modern filler has been around a long time. The basic system of forcing ground meat through a tube under controlled pressure was first patented in 1859, and modern vacuum fillers refine that old concept by removing air before filling, which helps texture, appearance, and shelf stability in commercial production, as noted by the Heinz History Center record on the Wagner sausage stuffer.
Practical rule: If the filler introduces inconsistency, the rest of the line spends the day trying to hide it.
What a good machine changes on the floor
In practice, a proper filler gives you three things.
- More uniform sausages: Product diameter and density stay closer from start to finish.
- Less operator strain: Staff spend less effort forcing product through and less time correcting poor fills.
- Cleaner output: Better pressure control usually means fewer voids, fewer split casings, and less mess on the bench.
For an Australian butcher doing mixed retail batches, that might mean switching from breakfast sausages to thicker butcher's sausages without turning the morning into chaos. For a processor, it means the filler supports the line instead of becoming the choke point.
A weak filler doesn't fail dramatically at first. It usually fails slowly. Extra minutes loading. More product left in the cylinder. More split casings. More cleanup. Those little losses pile up faster than most buyers expect.
Choosing Your Engine A Guide to Filler Types
Buying a filler is a lot like choosing an engine for a work vehicle. The wrong one can still move, but it won't suit the job. Some shops need precision on short runs. Others need reliable pace every day. The trick is matching the filler to batch style, staffing, and product mix.
What each type does well
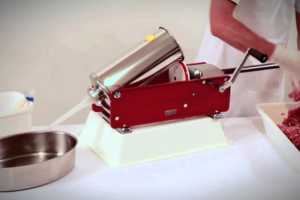
Manual fillers suit operators who want direct control and don't run large volumes. They're common in small butcher shops, specialty runs, test batches, and situations where one person is happy to trade speed for feel. They're also simple to maintain because there's less to go wrong. The downside is labour. On a busy morning, manual work becomes fatigue.
Electric fillers are often the middle ground. They're a big step up when manual filling has become the bottleneck. Commercial electric units in the 35 L class can range from about 300 kg/h to 600 kg/h, with motor power from 0.5 kW to 1.1 kW, according to this electric sausage filler machine specification page. That range matters because a machine that looks adequate on paper can still slow the room if the motor doesn't match your batch size.
Hydraulic fillers are usually chosen for pressure control, repeatability, and steadier filling on tougher production schedules. They're useful where consistency matters more than headline speed and where the machine needs to keep performing through repeated batches.
Pneumatic fillers fit sites that already think in compressed-air workflow and want smooth operation with less manual effort. They can work well in organised production rooms, but they only make sense if the air supply and maintenance discipline are already there.
If you stuff a modest batch before the shop opens, electric is often the practical step up. If the room keeps running all day, hydraulic or pneumatic usually makes more sense.
Sausage filler machine comparison
| Filler Type | Ideal For | Throughput | Pressure Control | Initial Cost | ||---|---|---|---| | Manual | Small shops, trial batches, artisan production | Low, operator-dependent | High hands-on control | Lower | | Electric | Retail butchers moving up from manual filling | About 300 kg/h to 600 kg/h in some 35 L models | Good | Mid-range | | Hydraulic | Processors needing repeatable commercial output | Production-focused | Strong and steady | Higher | | Pneumatic | Sites with suitable air setup and routine batch work | Production-focused | Smooth and controllable | Higher |
A few buying calls are straightforward once you're honest about the job.
- Choose manual if sausage making is important, but not the whole production day.
- Choose electric if staff are losing time and energy on repetitive filling.
- Choose hydraulic if consistency under pressure matters more than entry price.
- Choose pneumatic if your room already supports that setup and maintenance style.
What doesn't work is buying on sticker price alone. A cheap filler that slows two staff members every morning isn't cheap. It just hides its cost in payroll, waste, and frustration.
Key Specs Materials and Food Safety Construction
Spec sheets matter, but only if you know what they mean on the floor. Many buyers focus on capacity first. Capacity matters, but material finish, nozzle options, and hygienic construction decide whether the machine stays easy to live with after the first week.

What matters on the spec sheet
A professional sausage filler machine is built to hygienic food-equipment standards, not just workshop standards. A documented commercial hydraulic model is made in 18/10 stainless steel, uses stainless nozzles in 15, 20, and 30 mm, with optional 12, 25, and 43 mm sizes, and is described as complying with EC regulations, while specific INT models also comply with NSF/ANSI 8, as shown on Mainca's sausage filler and stuffer range.
Those details aren't marketing fluff. They tell you a lot.
- 18/10 stainless steel: Better suited to wet food environments where regular wash-down is part of life.
- Multiple nozzle sizes: Lets one machine cover different casing formats and product styles.
- Recognised compliance references: Helps when you're documenting hygienic equipment choices in your food-safety program.
If your team runs chipolatas, standard retail sausages, and thicker fresh product from the same room, the wrong nozzle range turns changeovers into a nuisance. The right range gives the machine more useful hours every week.
Why hygienic construction changes daily operations
A filler should be easy to wipe down, easy to strip, and easy to inspect. If meat can hide in threads, seams, dead spots, or awkward corners, it will. That adds labour and risk.
For Australian operators working under HACCP-based systems, the machine has to support your process instead of fighting it. A smoother, more sanitary design makes it easier to build practical procedures around cleaning, inspection, and verification. If you need a refresher on why that matters at business level, this article on what HACCP means in day-to-day operations is worth a read.
Equipment that's hard to clean doesn't stay clean. It stays risky.
Look closely at contact surfaces, seals, piston design, cylinder finish, and how easily staff can remove parts without damaging them. A filler that saves a few dollars upfront but adds cleaning headaches every day usually ends up being the more expensive machine.
Installation Casing Compatibility and Workflow
A new filler only pays off if it fits the room and the way your staff work. Plenty of machines look fine in a catalogue and become awkward the moment they land on site. The problem usually isn't the machine itself. It's poor placement, poor access, or poor planning around casings, tubs, power, and wash-down.

Set the machine up so staff can actually use it
Before the machine arrives, check the full path of work. Not just the footprint.
- Bench or floor position: The operator needs room to load, fill, turn, and unload without colliding with tubs or other staff.
- Power access: Confirm the site can support the unit you're buying. Electric, hydraulic, and pneumatic setups don't ask the same things from the room.
- Water and drainage: End-of-shift cleaning shouldn't involve dragging parts across half the premises.
- Workflow order: Put the filler where product moves naturally from mincer to filler to linking or tray-up.
A poor layout creates wasted steps all day. Staff carry tubs farther than necessary, twist awkwardly while filling, and stack product in the wrong place because there's nowhere better to put it.
This setup walkthrough is useful to watch before you finalise placement:
Nozzles casings and product range
Nozzle choice needs to match the casing and the product style. Too small and you force pressure into the mix. Too large and the casing won't sit right or fill neatly. That's where having access to the right range of sausage casings for different product styles becomes part of the setup conversation, not an afterthought.
A practical room layout often looks like this:
- Mincer discharge nearby: Keep raw mix transfer short.
- Filler next in line: Load quickly while the mix is still in good condition.
- Scales or portion control area beside the operator: Useful for repeat products.
- Packing bench close by: Filled product shouldn't travel across the room exposed.
If the machine forces staff to improvise every batch, the machine hasn't been properly installed, even if it's technically working.
The Real Cost of Ownership Cleaning and Maintenance
Most filler buying mistakes don't show up on day one. They show up every afternoon when the room has to be cleaned. If a sausage filler machine takes too long to strip, leaves product in hard-to-reach corners, or needs too much fiddly handling, you pay for it every shift in labour time and food-safety pressure.
That's why cleaning is part of ownership cost, not a side task.

Cleaning time is part of the machine cost
Most content in the market talks about output and model type. It says very little about cleanability, residue risk, or maintenance burden. That's a problem. Industry commentary has pointed out a knowledge gap around sanitation and compliance for sausage fillers, and in Australia those issues matter because processors are operating under tighter biosecurity and hygiene expectations after the national biosecurity review update in September 2024, as discussed in this sausage stuffer guide focused on selection basics.
A machine that's difficult to clean creates three headaches at once.
- It adds labour: Staff stay back longer, or cleaning gets rushed.
- It adds compliance pressure: Hidden residue makes verification harder.
- It shortens component life: Poor cleaning access often leads to rougher cleaning methods.
A practical wash-down routine
Good cleaning routines aren't complicated. They're disciplined.
Start by removing gross debris immediately after production. Don't let product dry onto the machine. Then disassemble the parts that are designed to come off. Cylinder, nozzle, seals, piston components, and contact surfaces all need direct attention. Wash first. Sanitise after. Those are different steps.
A practical routine usually includes:
- Initial strip-down: Remove food-contact parts as soon as the run finishes.
- Wash with attention to seams and seals: These are the first places residue hides.
- Visual inspection: Check gaskets, piston faces, and nozzle interiors before reassembly.
- Dry and store correctly: Don't reassemble wet if your site procedure calls for air drying.
A filler that saves ten minutes in production and loses half an hour in wash-up hasn't saved anything.
Manual machines can be simple but still slow if the cylinder and piston design are awkward. Hydraulic and pneumatic units can offer better production control, but they also demand disciplined maintenance and inspection. What works best is the machine your staff will clean properly every single day, not the machine that only looks good in a brochure.
Common Problems and Smart Troubleshooting
Even a solid machine can produce poor sausage if the setup, loading, or handling is off. Most faults aren't mysterious. They're usually pressure, air, temperature, or wear. The faster you identify the cause, the less product you waste.
Air pockets and uneven fill
Problem: Air pockets in the sausage, voids in the link, patchy density.
Common cause: Air was loaded into the cylinder with the meat mix, or the mix wasn't packed properly before filling. In practical terms, trapped air often leads to weak-looking product and can contribute to casing issues later.
Fix: Compact the mix into the cylinder firmly and consistently during loading. Don't drop loose handfuls in and hope the piston sorts it out. Keep the fill path clean, start steadily, and check that seals are seating properly. If the machine has started introducing more air than usual, inspect wear parts before blaming the meat mix.
Problem: One end of the batch looks firm, the rest gets sloppy.
Common cause: Inconsistent pressure from the operator, mix warming up on the bench, or staff changing pace halfway through the run.
Fix: Standardise loading and filling rhythm. Keep the mix moving. If the room keeps stopping and starting, organise the bench so the operator isn't reaching for casings, tubs, and ties in three different directions.
Burst casings and overworked meat
Problem: Casings split during filling.
Common cause: The nozzle doesn't suit the casing, the fill speed is too aggressive, or the casing is being overfilled. Sometimes the issue starts before filling if casings haven't been prepared properly for the product style.
Fix: Slow the fill, check nozzle fit, and let the casing move naturally off the tube. Don't force density into the casing at the stuffing stage. The aim is a clean fill that can still be linked without tearing.
Problem: The sausage texture looks smeared or overworked.
Common cause: Too much handling, too much time on the bench, or excessive pressure through an unsuitable setup.
Fix: Shorten the path from mincer to filler. Load efficiently. Keep the process calm. If staff are wrestling with the machine, the machine is probably mismatched to the job.
A useful floor rule is simple:
- If product looks airy, check loading and seals first.
- If casings burst, check nozzle match and fill aggression.
- If texture smears, check handling time and process flow.
Most sausage problems look like recipe issues at first. A lot of them are equipment-use issues instead.
Calculating ROI and Choosing Essential Accessories
A sausage filler machine pays for itself in the work it removes, the waste it prevents, and the consistency it protects. That's the right way to judge return. Not by the purchase price alone.
How to think about payback properly
Start with labour. How much time does filling currently take, and how many people are tied up doing it? Then look at hidden losses. Split casings, messy reloads, extra bench cleanup, product left in the machine, and slow changeovers all count. So does staff fatigue. A machine that makes the work easier often helps the room stay steady through the full shift.
Then look at production flexibility. A better filler can make it practical to run more than one sausage style without turning each changeover into a headache. That matters if you're balancing standard retail lines with seasonal or specialty products.
The most useful ROI questions are these:
- Does it remove a regular bottleneck?
- Does it reduce waste and rework?
- Does it support cleaner, more repeatable production?
- Will staff use it properly and clean it properly?
If the answer is yes to all four, you're usually looking at a sound investment.
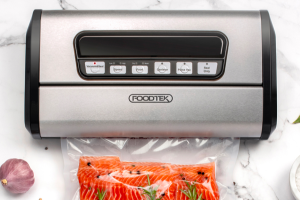
Vacuum equipment can also change the economics around finished product handling and storage. If you're reviewing the wider sausage-making station, this guide on vacuum machines and operational efficiency fits well beside filler planning.
Accessories that actually earn their place
The best accessories are the ones that remove friction from daily work.
A practical setup often includes:
- Casing options that match your menu: Natural and other casing types should suit the diameter and finish your customers expect.
- Spare nozzles and wear parts: If a nozzle is damaged or a seal is tired, the whole run suffers.
- Cleaning brushes sized to the machine: Small internal passages need proper contact, not guesswork.
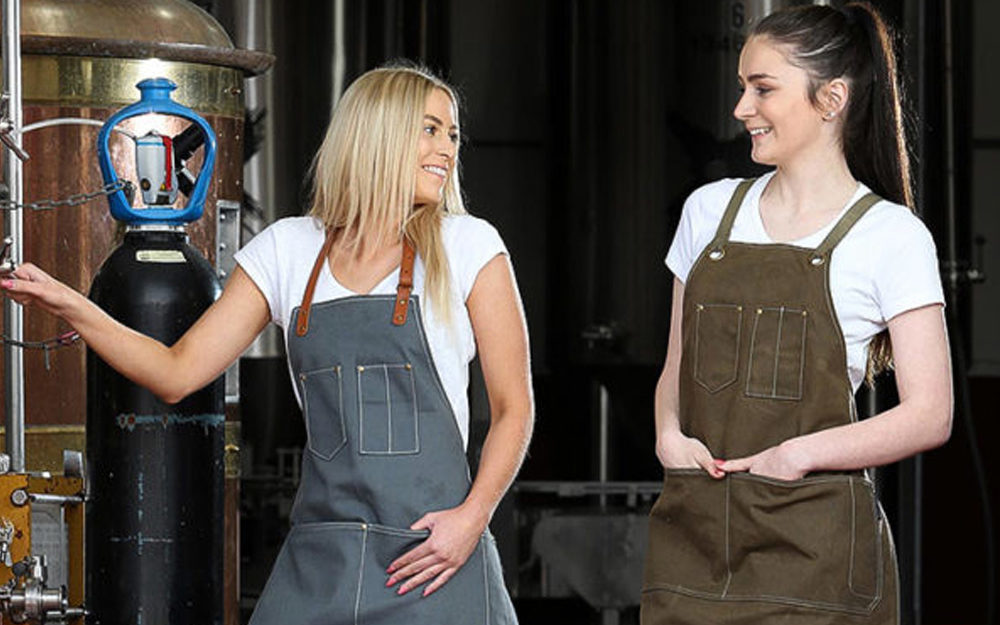
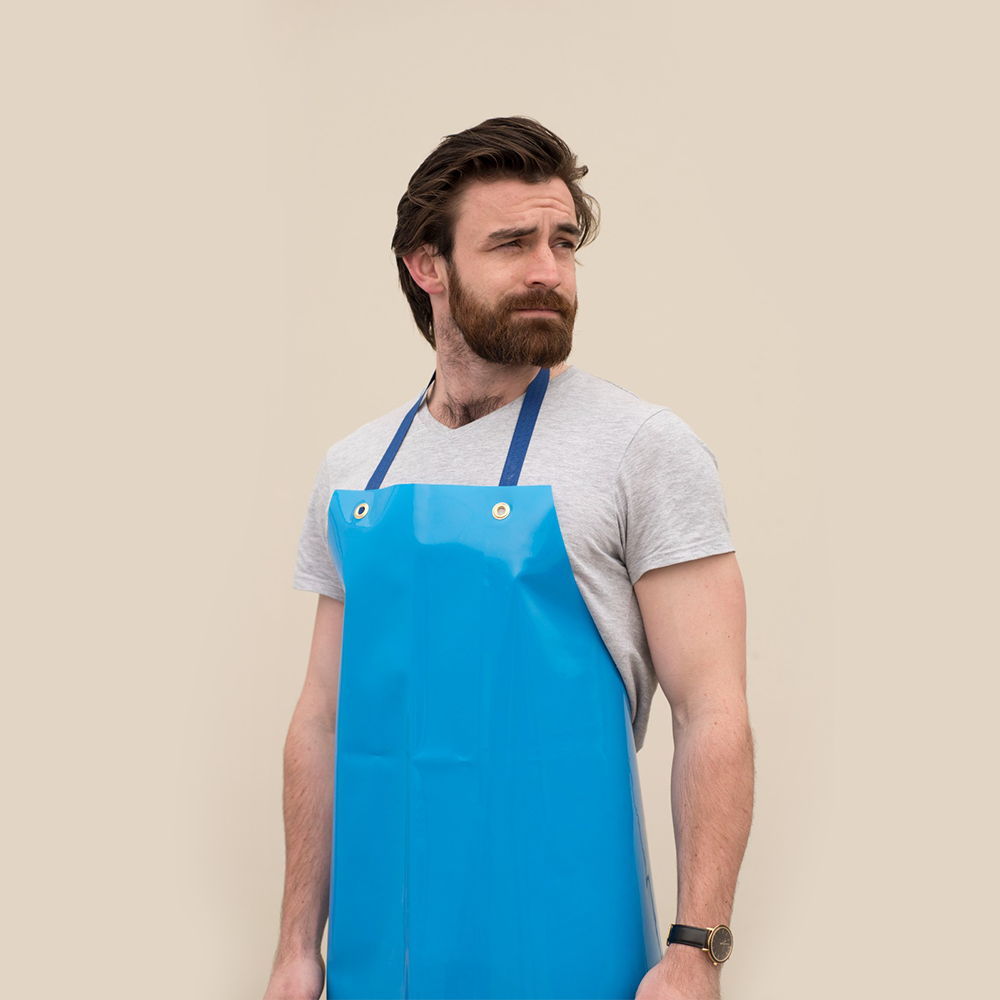
- Food-safe aprons and PPE: Filling and wash-down are wet jobs. Good protective gear keeps staff cleaner and more comfortable.
- Knife pouches and bench organisation items: Not glamorous, but they help keep tools where they belong during prep and packing.
Don't over-accessorise. Buy what removes delay, protects hygiene, and keeps the line moving. Leave the gimmicks out.
The right filler doesn't just stuff sausage. It steadies production. It helps staff work cleaner. It reduces avoidable waste. And it gives you a process you can repeat without drama, which is what most butcher shops and processors really need.
If you're comparing sausage filler machine options, casings, PPE, aprons, vacuum equipment, or other meat-processing supplies, PSC TRADING Co PTY LTD is worth a look. Their range covers machinery, consumables, protective workwear, and packaging used in butcher, abattoir, and hospitality environments across Australia.
Built with the Outrank tool