


You're probably standing at a bench with a tray of product that can't sit there much longer. Maybe it's fresh striploin, maybe marinated chicken, maybe a batch of mince you want packed cleanly before service or before it goes into the freezer. The machine is ready, the bags are on the table, and the question isn't whether vacuum sealing works. It's whether this next bag will hold, stack, freeze, thaw, and still protect the product when you need it.
That's where most bad guides fall short. They tell you to put food in a bag and press a button. That advice is useless when you're sealing moist meat, wet marinades, or soft products that love to foul a seal line. In a butcher shop, prep room, or commercial kitchen, small sealing mistakes turn into freezer burn, purge in the bag, failed packs, and product you can't confidently sell or serve.
Knowing how to use vacuum bags properly is less about the machine and more about controlling moisture, choosing the right bag, and spotting a bad seal before it costs you stock.
Table of Contents
- Why Mastering Vacuum Sealing Matters
- Choosing the Right Vacuum Bag and Machine
- Prepping Food for a Perfect Seal
- The Sealing Process From Start to Finish
- Labelling Storage and Safe Thawing
- Troubleshooting Common Vacuum Sealing Problems
Why Mastering Vacuum Sealing Matters
Anyone who's worked a freezer for long enough has found it. A good piece of meat that should've been saleable, serviceable, and profitable, spoiled by a failed pack. The cut was trimmed properly, portioned properly, dated properly, and then let down by one weak seal or one bit of liquid across the seal line.
That loss isn't just about appearance. In a butcher shop, a restaurant prep room, or an abattoir packing area, a failed bag can mean wasted labour, damaged stock rotation, and product that no longer reflects the standard of the business. If you've got premium beef with freezer burn, or fish with air trapped around the flesh, the product has already lost value before anyone opens the bag.
Vacuum sealing is really an inventory control job dressed up as a packing task. It protects the hours spent breaking down carcasses, trimming portions, marinating batches, and organising cold storage. Done properly, it also makes the freezer easier to run because packed product stacks cleaner, labels stay visible, and the shape of the bag supports faster counting and handling.
A vacuum bag doesn't rescue poor handling. It preserves good handling.
The biggest mistake new staff make is treating sealing like the final step. It isn't. It sits in the middle of quality control. The condition of the product, the dryness of the seal area, the bag thickness, the shape of the pack, and the machine setup all decide whether the result holds.
That matters most with moist products. Dry goods are forgiving. Fresh meat isn't. Marinades definitely aren't. If you don't control moisture, the bag can seal badly even when it looks acceptable coming off the machine. That's why experienced operators slow down at the bench and speed up in the freezer. They know the extra few seconds before sealing save a lot of grief later.
Choosing the Right Vacuum Bag and Machine
The first decision happens before any meat goes near the sealer. If the machine and bag don't suit the product, the job becomes harder than it needs to be.
Start with the workflow, not the catalogue
A chamber vacuum sealer and an external vacuum sealer solve different problems. Chamber machines suit commercial volume, wet products, and repeatable packing. External machines are useful when the workload is lighter, the budget is tighter, and most of the product is fairly dry.

In practical terms, I'd put it this way. If you're sealing marinated steaks, wet poultry portions, or regular production runs, chamber gear makes life easier. If you're doing occasional dry goods, portion control, or low-volume freezer packing, an external machine can still do sound work as long as the operator respects its limits.
Bag choice follows machine type. Chamber machines use smooth bags. External machines usually need embossed or textured bags so air has a path to travel during extraction. If the wrong bag goes with the wrong machine, you can end up chasing faults that aren't faults at all. For a broader overview of machine efficiency and workflow, this guide to vacuum machine efficiency and freshness is a useful companion.
Bag thickness matters more than most beginners think
A bag that's too light for the product will fail even if the seal itself is clean. Bone edges, sharp corners, and heavy handling in the freezer can all turn a decent pack into a leaking one.
For commercial meat processing in Australia, 70 micron vacuum bags are the industry standard for sous vide and vacuum sealing of meats, vegetables, and fish, while 100 micron bags are specifically required for bony meats like lamb shanks, ribs, and pork chops to prevent seal failure, as outlined by Pac Food Australia's guide to commercial vacuum sealing bags.
That lines up with what operators see every day. A boneless eye fillet is one thing. A tray of lamb shanks is another. If you pack a bony cut in a lighter bag, the failure may not happen on the bench. It often shows up later after stacking, transport, or freezer movement.
Quick matching guide
| Bag Thickness (Micron) | Best For | Example Products |
|---|---|---|
| 70 | Standard vacuum sealing and sous vide | Boneless beef portions, fish fillets, vegetables |
| 100 | Bony meats and products with puncture risk | Lamb shanks, ribs, pork chops |
A few practical checks help before you start:
- Match the machine first: Smooth bags for chamber sealers, embossed bags for most external sealers.
- Match the product shape: Flat portions pack more cleanly than awkward, bone-out corners.
- Match the handling risk: If the bag will be tossed into tubs, stacked tightly, or shifted through a busy freezer, use the tougher option.
Buy the bag for the product's sharpest point, not its average shape.
That's the habit that prevents a lot of grief.
Prepping Food for a Perfect Seal
Most sealing problems start before the lid closes. Product prep is where good operators separate themselves from button-pushers.
Moisture is the main enemy
With meat, the trouble is rarely the obvious splash you can see. It's the thin film of moisture, purge, marinade, or fat that creeps into the sealing area. That tiny contamination is enough to give you a weak bond.

Start by patting the product dry where practical. You're not trying to dehydrate the meat. You're trying to stop free moisture from riding up the inside of the bag. Even on a busy bench, a quick wipe with paper towel is often the difference between a clean seal and a callback from the freezer.
Some products need more than a wipe. Expert handling for ground meat includes pressing the meat downward while the vacuum is active to force trapped air pockets out, and pre-freezing meat and fish for 1–2 days before vacuum sealing is recommended to prevent bacterial growth and improve seal integrity, according to this ground meat vacuum sealing demonstration. That's especially useful when you're packing mince in volume and want a compact brick rather than a loose bag full of hidden air.
How to prep different products
Not every product should be handled the same way, a common pitfall for beginners.
- Fresh steaks and chops: Trim stray edges, keep the face of the meat tidy, and make sure no purge reaches the seal line.
- Mince and ground meat: Shape it firmly in the bag. Press it down during vacuuming so the bag fills the voids instead of trapping pockets.
- Fish portions: Keep them cold and firm. Soft fish shifts under suction and can drag moisture upward.
- Marinated product: Control the liquid before it controls the seal.
A wet marinated chicken fillet is the classic problem job. If you drop it into a bag carelessly, the top edge gets slick immediately. Then the sealing strip heats over marinade, fat, or spice residue, and the seal can fail without looking dramatic.
The clean seal zone rule
For marinated meat, one small habit saves a lot of bags. Always fold the top of the vacuum bag over before adding the product. This prevents liquid marinade from contaminating the heated sealing strip and helps produce a secure, leak-proof seal, shown in this Pac Food marinated meat sealing example.
Think of that folded cuff as a clean loading zone. Product goes in. The bag stays clean at the top. Then you unfold it and place a dry, flat opening into the machine.
Use this prep routine on the bench:
- Check the product temperature: Colder product behaves better and moves less.
- Dry the outside surface: Especially on meat with purge or marinade.
- Create bag headroom: Don't overfill. Leave enough clean area to position the bag properly.
- Keep the seal area clean: If you touch it with greasy gloves, wipe it or start again with a fresh bag.
- Square the product in the bag: A flatter pack seals and stacks better than a twisted one.
Bench rule: If the seal area feels damp, greasy, wrinkled, or crowded, it isn't ready for the machine.
That one check prevents a lot of false confidence later.
The Sealing Process From Start to Finish
Once the food is prepped properly, the machine should do a straightforward job. Most failures during the cycle come from bag placement, poor alignment, or using the wrong sealing mode for the product.

Set the bag correctly before you start
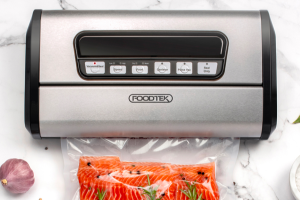
In the Australian food-processing sector, vacuum sealing machines help extend the shelf life of meat by reducing oxygen exposure to less than 1%, and bags must be inserted flat into the vacuum channel with the open end against the sealing strip. The process typically completes in under 10 seconds, as described in Pac Food Australia's vacuum sealer operating guide.
That tells you two things. First, placement matters. Second, the cycle itself is quick, which means you don't have much time to correct a badly loaded bag once the machine starts.
Lay the open end flat. No folds. No trapped scraps. No product creeping into the seal band. If you're using a chamber machine with high throughput, get into the habit of smoothing the mouth of the bag with two hands before every cycle. It becomes automatic after a while, and it prevents a lot of rework.
If you're reviewing bag options for that workflow, this range of heavy-duty BPA-free vacuum bags for Australian and New Zealand kitchens gives a practical reference point for suitable pack styles.
Choose the right cycle for the product
Different products need different handling under suction.
- Use pulse mode for delicate items: This gives you control when sealing softer foods or anything you don't want crushed.
- Use a full vacuum cycle for meat and poultry: That gives a tighter pack and better long-term storage result.
- Watch the bag shape: If liquid starts racing toward the seal, stop and reset before you waste the bag.
A lot of new operators trust the machine too much. Machines don't judge product shape. They just run the cycle you ask for.
Here's a quick visual demonstration of machine loading and sealing in action:
How to inspect the finished seal
The cycle ending doesn't mean the job's done. Inspect every bag.
The finished seal should be a clear, even band right across the bag, with no gaps, wrinkles, cloudy patches, or trapped contamination.
Check the corners first. That's where weak seals often show themselves. Then press gently around the product to see whether the vacuum is consistent or whether hidden air remains in pockets.
If the seal looks patchy, don't talk yourself into keeping it. Rebag it while the product is still cold and the bench is still set up. That takes less time than finding the failure after freezing.
Labelling Storage and Safe Thawing
A sealed bag with no label is just a delayed mistake. Someone will have to identify it later, and that usually happens when the bench is busy and no one has time to guess.
What every packed bag should show
Every bag should be marked before it disappears into a tub or carton.
At minimum, label:
- Product name: Don't rely on memory once bags frost up.
- Packed date: You need this for stock rotation.
- Weight or portion detail: Useful for ordering, prep, and picking.
- Batch or use note when needed: Especially with marinades, flavoured items, or production runs.
That sounds basic, but it's where a lot of freezers become expensive. Two similar-looking packs can move through storage very differently. A labelled system keeps FIFO practical instead of theoretical.
For teams tightening their overall packing process, this guide to vacuum machine bags for freshness and storage is worth keeping alongside your bench procedures.
Freezer organisation prevents damage
Storage is mechanical as much as administrative. Bags get torn when they're shoved under sharp corners, bent around crowded tubs, or stacked under unstable loads.
Good freezer discipline looks like this:
- Keep flat packs flat: Don't drape them over uneven surfaces.
- Separate bony products carefully: Sharp corners can puncture neighbouring bags.
- Use airflow aids in larger operations: Freezer pallet spacers help maintain airflow when product is frozen in batches.
- Store by category and date: That reduces unnecessary handling.
A neat freezer isn't just tidy. It protects seals from the rough handling that destroys them.
If you've packed product cleanly but throw it into a crowded freezer without thought, you can still lose the bag. Sealing and storage are part of the same job.
Safe thawing is part of the job
One rule matters here. For best results with vacuum-sealed frozen meats or fish, remove the food from the vacuum bag before thawing in the refrigerator, or cook it immediately from frozen. Thawing in the bag can compromise safety and texture, as explained in Pac Food Australia's moist food sealing guidance.
That catches some people out because the sealed bag looks protective. But a bag that's ideal for frozen storage isn't automatically the right environment for refrigerated thawing.
So the routine is simple:
- Take the pack from the freezer.
- Either cook from frozen, or remove it from the bag first.
- If thawing in the fridge, place the product in a suitable tray or container.
That step belongs in staff training because it often gets missed by people who only learned the packing side.
Troubleshooting Common Vacuum Sealing Problems
Even a tidy setup throws problems at you. The useful habit is to diagnose the failure quickly instead of wasting bag after bag.

Bag not sealing properly
| Problem | Likely Cause | Solution |
|---|---|---|
| Bag not sealing | Creases or contamination in the seal area | Flatten the opening, trim if needed, and make sure the seal zone is clean and dry |
| Incomplete vacuum | Product shape, trapped air, wrong bag loading | Reposition the product, smooth the bag, and reset the opening properly |
| Machine getting too hot | Repeated cycles without pause | Let the machine cool briefly before continuing |
If the seal area is wrinkled, the heated strip can't make an even bond. If there's fat, marinade, or mince residue near the mouth, the bag may appear sealed but won't stay that way.
Seal looks fine but fails later
This usually points back to prep or handling. Moisture contamination is a common culprit. So are tiny punctures from bone or rough freezer stacking.
Check these points:
- Was the seal line fully dry before loading?
- Was the correct bag thickness used for the cut?
- Did the bag get bent or crushed after packing?
A bag can come off the machine looking acceptable and still fail after freezing if the bond was compromised from the start.
Wet product keeps breaking the seal
At this point, experienced operators stop fighting the machine and change the packing method.
For high-moisture cuts like sliced beef, a practical technique is to place the meat in a vacuum bag, roll it tightly like a burrito, and slip it into a second bag with the inner bag's open end facing downward to stop juices from breaking the seal, as shown in this double-bagging example for wet sliced beef.
That's a trade fix, not a gimmick. It gives the liquid somewhere to stay while the outer bag seals cleanly.
If wet product keeps beating your seal, change the pack shape or bag setup. Don't keep repeating the same failed cycle.
The same thinking applies across the bench. When something goes wrong, ask whether the fault is the machine, the bag, the product, or the operator's setup. Most of the time, the answer shows up fast once you look at the seal line and the condition of the product going in.
If you're reviewing vacuum machines, vacuum bags, or meat processing supplies for a butcher shop, abattoir, hospitality venue, or food production site, PSC TRADING Co PTY LTD supplies equipment and consumables built for Australian processing environments.