




You're probably here because something has already gone wrong. A tray of premium steaks comes out of the freezer with grey edges and freezer burn. A batch of sausages starts leaking purge in the cool room. A soft bag that looked sealed yesterday has puffed up today, and now no one trusts the stock inside it.
That's usually when people stop treating vacuum seal food saver bags like a minor consumable and start treating them like part of the production system. On a butcher's floor or in a commercial kitchen, the bag matters just as much as the sealer. The wrong film, the wrong thickness, or the wrong workflow turns good product into waste fast.
Most guides stop at the easy promise that vacuum sealing keeps food fresh longer. That's true, but it's incomplete. What matters in practice is knowing which bag suits which machine, how to get a reliable seal every time, and where actual food safety risks sit, especially with oxygen-free storage.
Table of Contents
- Why Your Bottom Line Depends on the Right Bag
- Choosing Your Bag Material and Type
- Matching the Bag to Your Vacuum Sealer
- The Professional's Vacuum Sealing Workflow
- A Practical Guide to Food Safety and Shelf Life
- Troubleshooting Common Vacuum Sealing Failures
- Smart Procurement and Sustainable Packaging
- Frequently Asked Questions
Why Your Bottom Line Depends on the Right Bag
A butcher usually notices packaging failures at the worst moment. Not when the bag goes through the machine, but later. You pull product for a customer, and the seal has lifted. You go to rotate freezer stock, and sharp bone has punched a pinhole through the corner. You open a carton and realise half the bag size you bought isn't right for the cuts you move every day.
That's not a bag problem alone. It's margin walking out the door.
If you're packing lamb racks, smoked smallgoods, marinated chicken, or portioned mince, the bag controls far more than presentation. It affects freezer life, purge control, seal integrity, speed on the bench, and how confidently staff can pack the same item all day without rework. One weak seal or one puncture can ruin a premium cut that took real labour to prepare.
Where losses usually start
Most losses come from ordinary mistakes, not dramatic equipment failure:
- Wrong bag for the cut. Bone-in product in a light bag is asking for punctures.
- Wrong bag for the machine. A smooth pouch on a suction machine wastes time and often won't evacuate properly.
- Dirty seal zone. Fat, brine, or mince smear at the mouth of the bag weakens the seal.
- Overfilling. Staff leave no headspace, then wonder why the machine struggles.
Practical rule: If the bag doesn't suit the product, the machine can't rescue it.
There's also a broader reason this matters. In Australia, the food & beverages industry held the dominant share of the vacuum sealer bags market in 2024, which tells you these bags aren't niche packaging anymore. They're standard working equipment in food operations, not a side purchase.
Good vacuum sealing protects stock. Better vacuum sealing protects reputation. That difference usually comes down to material choice, machine compatibility, and disciplined handling on the floor.
Choosing Your Bag Material and Type
A lot of packing failures start before the machine is switched on. Staff grab whatever bag is closest, the product goes in, the seal looks acceptable, and the trouble shows up later as purge, freezer burn, oxidation, or a split corner in the cool room. Bag choice decides how much abuse the pack can take and how much protection the food gets.

Two bag types do most of the work in real operations. Embossed or channelled bags have a textured surface that leaves small air paths during evacuation. Smooth chamber pouches do not. That difference sounds minor, but it decides whether air can be pulled out properly and whether the result is consistent enough for repeated production.
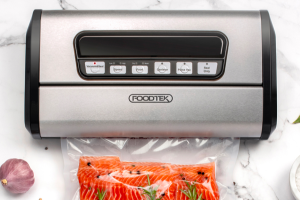
For operators comparing formats before they buy stock, PSC Trading's overview of Foodtek vacuum bags in a 50 pack heavy-duty BPA-free food storage solution shows the sort of range people assess when balancing bag style, thickness, and day-to-day handling.
Embossed bags versus smooth pouches
Embossed bags suit external suction machines because the machine needs those channels to move air from the mouth of the bag. Smooth bags suit chamber machines because the vacuum is created around the whole pouch. Put the wrong bag on the wrong machine and staff usually end up with trapped air, poor seal appearance, or repeat cycles that waste time.
The product matters too.
- Dry portions, snack items, and light freezer packing often work well in embossed bags.
- Boneless primals, fresh meat cuts, and higher-volume production usually run better in smooth chamber pouches.
- Liquids, wet marinades, and sauces are usually cleaner and more controllable in chamber pouches.
That is the machine side of the decision. The food safety side gets less attention, and it matters more than many buying guides admit. A vacuum bag removes oxygen. It does not sterilise the food. Once oxygen is reduced, some spoilage organisms slow down, but anaerobic hazards can still grow if time and temperature are poorly controlled. That is one reason bag selection should include barrier performance, seal reliability, and how well the pouch holds under chilled storage, not just whether it pulls a tight pack.
Thickness, barrier properties, and puncture resistance
Film thickness changes how the bag handles sharp edges, freezing stress, and rough handling in tubs and crates. Thin film can be fine for mince, sausages, sliced product, or soft boneless portions. It is a poor choice for shanks, chops, bone-in lamb, or anything with a hard point that presses into the pouch once vacuum pulls the film tight.
On the floor, I treat it this way:
- Light to medium film for soft, boneless, low-risk shapes.
- Heavier film for bone-in cuts, hard corners, or longer frozen storage.
- Corner protection or bone guards for exposed points, even with heavy bags.
A bag also needs enough oxygen barrier to slow colour loss and rancidity. Multi-layer construction helps with that, especially on fatty cuts and cooked products that show oxidation quickly. Better air removal helps too, but numbers on product pages do not matter much if the pouch gets nicked by a bone or sealed through a smear of fat.
Cheap film creates expensive waste. A few cents saved per bag disappears fast when premium product has to be repacked, discounted, or thrown out.
One more practical point. Strong barrier bags can extend usable life, but they also make temperature discipline more important. In reduced-oxygen packs, poor chilling is harder to spot because the product may look acceptable before it becomes unsafe. For butchers and commercial kitchens, the right bag is the one that matches the machine, survives the product, and supports a cold-chain process that staff can repeat without shortcuts.
Matching the Bag to Your Vacuum Sealer
A lot of wasted money in vacuum packing comes from buying bags first and figuring out machine compatibility later. That's backwards. Start with the machine on your bench, then buy the bag that works with it.

External sealers for lighter workflows
External suction sealers make sense for lower-volume work. They're common in homes, small delis, test kitchens, and businesses that only pack limited lines each day. They're straightforward, compact, and good for dry product if staff use the right textured bag and don't rush the process.
They're less forgiving when product is wet, oily, or irregular. If you're packing marinated meats, cooked reductions, or anything with liquid close to the seal line, suction machines can become frustrating. Air removal can be inconsistent, and liquid can creep toward the seal bar.
They still have a place. For small-batch work, they can be perfectly serviceable. The mistake is expecting them to behave like chamber machines during a busy production run.
Chamber machines for regular production
If you're running steady volume, chamber machines are usually the practical answer. They work better for repeated packing, cope more cleanly with wet items, and let staff use smooth pouches that suit commercial throughput. They're also easier to standardise across a team because the process is less fussy bag to bag.
The Australian market pattern backs up how embedded these products are in food operations. In 2024, the food & beverages industry was the leading end-use sector, while plastic vacuum bags dominated by product type and medium-sized bags (1 quart to 2 gallons) were the most popular size category, according to Towards Packaging's Australian vacuum sealer bags market sizing overview.
That lines up with what many processors see in practice. Medium bags handle a lot of everyday jobs well: steak portions, small roasts, blocks of cheese, sausages, and prepped kitchen items.
If you're comparing machine styles in more detail, this guide to vacuum machines and sealing efficiency is worth reviewing alongside your bag choices.
A practical buying framework looks like this:
| Operation type | Common machine fit | Bag type that usually suits |
|---|---|---|
| Home use or occasional sealing | External suction sealer | Embossed or channelled bag |
| Small deli or light commercial | External sealer or compact chamber | Depends on machine style |
| Butcher, processor, or busy kitchen | Chamber sealer | Smooth chamber pouch |
Buy the machine and bag as a pair. If they're mismatched, the rest of the workflow never feels stable.
The Professional's Vacuum Sealing Workflow
A strong result comes from routine, not luck. Staff who get reliable seals every day usually follow the same habits every time, even on busy prep days.
Start with the visual workflow below, then tighten up the details that usually separate a clean pack from a failed one.

Non-negotiable prep before sealing
Always cool the product first. Warm food creates moisture and steam. That's bad for the seal area and bad for food safety handling. Stocks, braises, and sauces should be cooled before bagging.
Cuff the top of the bag. Fold the opening back before filling. That keeps fat, crumbs, blood, and marinade off the seal zone. After filling, unfold the cuff and lay the mouth flat. This one habit prevents a lot of failures.
Leave enough headspace. Staff often overfill bags trying to save material. Then the machine can't position the mouth cleanly, or the product sits too close to the seal line. Leave room so the machine can do its job.
Protect sharp points. Bone guards help. So does a folded scrap of bag material placed over a sharp edge. If you pack bone-in chops or racks often, this habit saves product.
Keep the seal area clean enough that you'd trust it before the machine even starts.
For teams that want a basic operational refresher, PSC Trading's article on how to use vacuum bags covers the standard handling sequence.
This quick demonstration is useful for staff training and consistency checks:
Checks after the cycle finishes
Don't toss packed product straight into the crate without looking at it. Inspect the seal first.
Use this short post-seal check:
- Check the seal line. It should be even, unbroken, and fully fused across the width.
- Look for wrinkles. A crease through the seal can become a leak later.
- Press around bones and corners. If the bag is stretched white or looks stressed, protect that area or repack it.
- Double-seal for critical applications. Long freezer storage, sous vide prep, and transport jobs often justify a second seal.
- Label and move it immediately. Don't leave packed food sitting on a warm bench waiting for someone else.
Wet items need extra control. If you're packing liquid-heavy foods in a non-chamber setup, pre-freeze them until the surface firms. That helps stop liquid from rushing toward the seal bar. In production, that can mean the difference between one clean pass and three failed attempts.
Good vacuum sealing is repetitive work. That's a strength, not a weakness. Once the process is disciplined, staff produce the same result shift after shift.
A Practical Guide to Food Safety and Shelf Life
At 4:30 on a Friday, a vacuum-packed bag of cooked product that has been sitting too warm can look perfect. Tight bag, clean seal, no visible spoilage. That is exactly why vacuum sealing gets misused. The bag improves quality retention, but it also removes oxygen and changes which organisms can grow.
Used properly, vacuum sealing is excellent for protecting colour, slowing freezer burn, and reducing oxidation. FoodSaver's beginner guide to vacuum sealing gives broad examples of shelf-life improvement, including beef and poultry frozen for up to three years, hard cheese lasting up to eight months under refrigeration, and dry goods such as flour or sugar storing for much longer than they do in ordinary packaging. Those figures are useful as product-quality references, not as permission to relax temperature control or date coding.
What vacuum sealing does well
On the production floor, vacuum sealing earns its keep in a few clear jobs. It holds product quality better than loose wrap. It helps portion control. It cuts freezer damage. It also makes stock rotation cleaner because packs are compact, labelled, and easier to stack without exposure to air.
Here is a simple reference based only on the figures cited above.
Extended Shelf Life with Vacuum Sealing
| Food Item | Conventional Refrigerator | Vacuum Sealed Refrigerator | Conventional Freezer | Vacuum Sealed Freezer |
|---|---|---|---|---|
| Hard cheese | Not specified | Up to 8 months | Not specified | Not specified |
| Beef | Not specified | Not specified | Not specified | Up to 3 years |
| Poultry | Not specified | Not specified | Not specified | Up to 3 years |
| Flour | Not specified | Not specified | Not specified | Up to 2 years |
| Sugar | Not specified | Not specified | Not specified | Up to 2 years |
Bag construction matters too. Thicker multi-layer bags generally give better oxygen resistance and better puncture resistance than light domestic bags, especially with sharp cuts, bone-in portions, and long freezer storage. Results still depend on the product, the seal quality, and the storage temperature.
What many bag guides leave out
The safety issue is anaerobic growth.
Vacuum sealing removes oxygen. Some spoilage organisms slow down in that environment. Others do not. Clostridium botulinum is the one professionals worry about because it can grow in low-oxygen conditions if time and temperature are abused. A vacuum bag does not kill it, and the pack may not show obvious warning signs before it becomes unsafe.
That is why high-risk foods need stricter handling than the usual "freshness lasts longer" sales pitch suggests. Garlic, onions, mushrooms, soft cheeses, cooked foods, and ready-to-eat items all need careful control. If they are vacuum packed, they still need correct refrigeration or freezing, clear date marking, and disciplined turnover. In some cases, they should not be vacuum packed for casual storage at all unless the process has been assessed properly.
The Australian Department of Agriculture, Fisheries and Forestry sets out the broader storage and food safety responsibilities for businesses handling higher-risk food in its food safety guidance: https://www.agriculture.gov.au/biosecurity-trade/export/controlled-goods/plants-plant-products/food-safety
The practical point is simple. A tight bag is not proof of safety.
Vacuum sealing protects quality. Safe shelf life still depends on product type, temperature, hygiene, and date control.
Practical rules that hold up in real kitchens and butcher shops
- Keep vacuum-packed high-risk food cold from the moment it is packed. Bench time still counts.
- Treat cooked and ready-to-eat products with extra caution. They often go straight from the bag to service, so there is less margin for error.
- Do not assume the longest possible storage time applies to every product. Fat content, moisture, acidity, salt level, and handling all change the result.
- Be careful with raw garlic, onions, mushrooms, and soft cheeses. Low oxygen changes the risk profile for these foods.
- Use clear pack dates and use-by controls. Vacuum sealing without labelling is just delayed confusion.
- Train staff to separate quality from safety. Good appearance and a strong vacuum do not confirm that a product is safe to eat.
In short, vacuum sealing is a quality-control tool first. Food safety still comes from refrigeration, sanitation, validated handling procedures, and staff who understand that low oxygen can create a different set of risks, not remove them.
Troubleshooting Common Vacuum Sealing Failures
Friday prep goes sideways fast when ten packs from the same batch come back with loose seals or puffed bags. At that point, the machine often gets blamed first. On the floor, the actual cause is usually simpler. Product contamination in the seal area, the wrong pouch for the machine, poor bag handling, or a puncture that was there from the start.
Start with the failed pack in your hand. A weak seal leaves clues if you check it properly.
When the bag won't seal properly
If the seal looks thin, patchy, or easy to peel apart, inspect the top 30 to 40 mm of the bag before touching the settings. Heat bars cannot seal through fat, purge, crumbs, or a fold in the film.
| Problem | Likely cause | Practical fix |
|---|---|---|
| Seal line looks patchy | Fat, moisture, or crumbs on the seal area | Wipe the mouth clean and re-bag if needed |
| Bag wrinkles across the seal | Mouth inserted crooked or with folds | Lay the opening flat and straight |
| Air remains inside | Wrong bag type for the sealer | Match embossed bags to suction machines and smooth pouches to chamber machines |
| Bag loses vacuum in storage | Pinhole from bone or sharp corner | Use a heavier bag or add bone protection |
A bag that inflates later is a different problem from a bag that never sealed well in the first place. Late inflation points to a pinhole, a marginal seal, or product gas. That last cause matters more than many operators admit. In a low-oxygen pack, spoilage organisms and anaerobic hazards do not behave the same way they do in a tray wrap or loose bag, so a swelling pouch should be pulled and assessed, not pressed back down and left in storage.
Check the corners and pressure points next. Bone tips, hard frozen edges, skewered items, and sharp shell fragments can nick film without leaving an obvious tear. If the product has edges, build protection into the pack. Bone guard, folded barrier film, or a heavier pouch costs less than rework and disposal.
When reused bags keep failing
Reused bags fail for predictable reasons. The old seal area is trimmed too close. The film has heat stress from the first cycle. Grease stays on the inside lip even after a quick wash. All three problems show up as intermittent failures, which are the worst kind to chase.
The practical rule is simple. Reuse only if the bag material, previous contents, and your cleaning method make it a controlled decision rather than a gamble.
- Reuse only when the bag is suitable for it
- Degrease thoroughly, not just rinse until it looks clean
- Do not reuse bags that held raw, fatty meats unless your cleaning process is controlled
- Discard bags with cut edges, stretched corners, odour retention, or film damage
For commercial food work, I would rather use a new pouch than argue with an unreliable reused one. A fresh bag is cheap. Lost product, extra labour, and a questionable pack date are not.
Another mistake is trying to save a contaminated bag by making a second seal above the first one. If fat or moisture caused the failure, the second seal often fails too because the underlying problem is still there. Cut the bag back only if there is enough clean material left to form a proper seal. Otherwise, re-bag the product.
Methodical checks solve these issues faster than random adjustments. Confirm the bag type. Confirm the seal area is clean and dry. Confirm there is enough headspace for the bar to seal cleanly. Then inspect for punctures and stress points. That process fixes more failures than chasing machine settings one button at a time.
Smart Procurement and Sustainable Packaging
Monday morning usually exposes a bad bag program fast. Staff are halfway through portioning, the correct pouches are gone, someone grabs an oversized bag to keep the line moving, and now you are paying for wasted film, slower packing, and uneven carton presentation. If those packs are headed into chilled storage for protein, bag buying is no longer a stationery decision. It affects shelf life, handling, and food safety margins.

Buy for the job, not just the carton price
Cheap bags get expensive when they create avoidable waste or put product at risk. A commercial kitchen or butcher shop should buy around its actual pack mix: steaks, sausages, mince, roasts, cooked items, and any wet products that challenge the seal area. If one bag size only works reasonably well for all of them, it is usually the wrong size for half the work.
Bag choice also changes the risk profile. Higher-barrier, heavier film can make sense for longer chilled storage, export-style holding times, or higher-value cuts where oxygen exposure and drip loss cost real money. That does not mean buying the thickest pouch for everything. It means reserving stronger film for products that justify it, especially bone-in cuts, sharp edges, or stock that may sit longer under vacuum.
Procurement should also account for the products that create the highest safety pressure. Vacuum packaging lowers oxygen, which helps with oxidation, but it also creates conditions anaerobic bacteria can tolerate if temperature control slips. That is the part many buying guides skip. A bag that seals well and matches the machine reduces leaks and rework, but it does not make poor chill control safe.
If you want one supplier that covers more than bags, PSC TRADING Co PTY LTD is one Australian option because it supplies vacuum machines, vacuum bags, meat processing equipment, PPE, and related butchery consumables from the same catalogue. For some operations, that keeps ordering tighter and reduces the usual split between packaging stock and the rest of the processing floor.
Waste reduction starts with sizing
The cleanest sustainability win is using less material in the first place. Oversized bags are common on busy benches because they are convenient, but they waste film and often leave excess plastic that catches, folds, or interferes with consistent presentation.
A tighter bag range usually works better than a huge catalogue no one follows.
- Keep a small core range of sizes that covers the products you pack every day.
- Hold heavier bags for puncture risk or long storage, instead of treating every item like a worst-case job.
- Use rolls only where staff will cut them consistently and the product length varies.
- Review obsolete stock regularly so odd sizes do not sit on shelves until someone uses them badly just to clear space.
There is also an environmental trade-off that needs stating plainly. Rework, failed seals, spoiled meat, and early disposal create waste too. Using a slightly heavier bag for the right product can be the lower-waste decision if it prevents loss and keeps the pack sound through storage and distribution.
The best bag program is usually boring. A few correct sizes, clear rules on where each one is used, stable supply, and no guessing on the bench. That saves film, protects product, and avoids the bigger cost of packing food into the wrong conditions and hoping the chill room saves you later.
Frequently Asked Questions
Are all vacuum bags suitable for sous vide
No. Staff often assume any vacuum bag can go straight into sous vide work. In practice, you should only use bags intended for that use and suited to your machine. If there's doubt, check the bag specification before it goes near a water bath.
What does bag thickness actually tell me
Thickness tells you how much abuse the film can usually handle before puncture or seal stress becomes a problem. Thicker bags make more sense for bone-in cuts, hard edges, and longer storage. Lighter bags are often fine for boneless portions and dry goods.
Are rolls better than pre-cut bags
It depends on the workflow. Rolls reduce waste when product sizes vary a lot. Pre-cut bags are faster when you're packing the same lines all day and want staff moving quickly without measuring and cutting.
Can I reuse vacuum seal food saver bags
Sometimes, but not blindly. Reuse becomes risky when grease, meat residue, odours, or film damage remain. If a used bag won't seal reliably after proper cleaning, discard it.
Why does a bag look sealed but lose vacuum later
That usually points to one of two issues. Either the seal area was contaminated or the bag took a small puncture from a corner, bone, or rough handling after packing.
Vacuum sealing works well when the bag, machine, and handling method all match the job. If you're packing food professionally, that's the standard to hold. Not just longer freshness claims, but clean seals, fewer failures, and safer storage decisions every day.
