
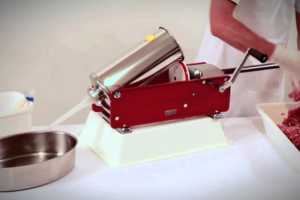






The last carcass is moving towards the chiller, the rail is slick with fat and blood, and everyone wants to get home. A hose across the floor and a quick spray over the mincer can look like progress, but they don't remove the protein packed inside a worm housing, the bone meal under a bandsaw guide, or the residue drying on a sausage stuffer horn.
That end-of-shift window is where good production discipline either holds or fails. Equipment sanitation procedures need to turn cleaning into a controlled shop-floor process, with the right sequence, measurable temperature or chemical controls, complete disassembly, verification, and records. Australian food businesses must keep premises, equipment and food transport vehicles clean and sanitary under Standard 3.2.2, and food-contact surfaces must be cleaned and sanitised before use and between raw and ready-to-eat food uses, as set out in FSANZ's food safety cleaning and sanitising guidance.
Table of Contents
- Why Sanitation Stops Being Optional After the Last Carcass
- PPE, Cleaning Agents, and the Six-Step Sanitation Sequence
- Chemical vs Heat Sanitising for Meat Processing Equipment
- Disassembly and Reassembly Without Missing the Hard-to-Reach Spots
- Building a Cleaning Schedule That Survives a Busy Week
- Verification, Records, and Corrective Actions That Hold Up to Audits
- Common Shortcuts That Fail and a Final Sanitation Checklist
Why Sanitation Stops Being Optional After the Last Carcass
At the end of a shift, the floor may look clear while food residue remains inside the equipment. Blood, fat and meat particles collect in seams, grooves, bearings and joints. Once protein dries on stainless steel, a wipe can remove the colour while leaving a film that shields contamination from sanitiser.
A mincer shows why the shutdown procedure must follow the product path. The hopper may be clean while the auger, knife, plate and rear housing still hold residue. On a bandsaw, bone dust settles in wheel grooves and under the lower guide. A sausage filler horn left to “soak later” can become the first contamination point of the next run.
Practical rule: If a part touches food, or can drain onto a food-contact surface, include it in the sanitation procedure.
Australian requirements support this level of control. Standard 3.2.2 requires food businesses to keep equipment clean and sanitary, including cleaning and sanitising food-contact equipment before use and between raw-food and ready-to-eat uses. For meat and poultry processing, NSW Food Authority guidance calls for a documented schedule covering each fixture, fitting and equipment item, with its frequency, method, chemical strength, contact time and temperature. The same guidance expects internal sanitation inspections and corrective-action records.
For meat processing, the Australian red meat market access technical resource cites AS 4696:2023 and its cleaning requirements at the end of each day, before operations begin and between shifts. It also identifies potable water at no less than 82°C for sanitising implements used in meat processing. Use the applicable temperature or chemical control, then verify that the equipment is ready for production.

Illustration of the three contamination risks after production stops.
Sanitation is part of production control, not a closing ritual. It protects the first batch of the next shift only when operators use a defined procedure under controlled conditions.
PPE, Cleaning Agents, and the Six-Step Sanitation Sequence
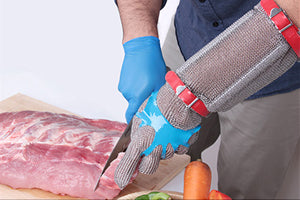
The operator needs to be protected before the first hose is turned on. On a meat-room clean, that generally means a cut-resistant apron, rubber boots, suitable gloves, eye protection, and a face shield when handling caustic foam. A chain-mail glove belongs with blade work, particularly during bandsaw handling. Colour-coded gloves also matter, because gloves used around raw meat shouldn't be dipped into a cleaning bucket and then carried back to a food-contact task.
A waterproof apron from PSC TRADING Co PTY LTD can be used as one option for wet processing work, alongside site-approved gloves, boots and face protection. Disposable nitrile gloves are useful for particular handling tasks, but they still need to be selected and changed according to the site's risk assessment, as outlined in this guide to nitrile disposable gloves.
Match the agent to the residue
Alkaline detergents break down fat and protein. Chlorinated alkaline products can suit heavy blood loads where the product label and equipment materials allow their use. Acid descalers have a different job, removing mineral scale from items such as heat exchangers. Quaternary ammonium or chlorine sanitisers are used only at the approved label dilution and contact time. Never mix chemical categories unless the manufacturer's instructions explicitly allow it.
Run the same sequence every time
- Dry scrape. Remove gross meat, fat and bone with a scraper or disposable wipe. A bandsaw wheel groove needs this attention before water turns the residue into slurry.
- Pre-rinse. Use warm water rather than very hot water at this stage. Hot water can set protein onto a surface, making the later detergent stage less effective. On a mincer, rinse the hopper, auger chamber and removable components separately.
- Apply detergent. Cover the equipment with the approved detergent and allow the specified dwell time. Soil load matters, so the operator should follow the site procedure rather than guessing from foam appearance.
- Mechanically scrub. Use dedicated brushes and non-abrasive pads. Work around threads, guards, guide bushings and welds. Pressure alone won't replace brushing inside a mincer housing or under a bandsaw insert.
- Post-rinse. Rinse away detergent and loosened residue until no visible film remains. Rinsing inside hollow or recessed parts prevents chemical residue from being left behind during reassembly.
- Sanitise and verify. Apply heat or chemical sanitiser according to the approved method. Check chemical concentration with the appropriate test method, and confirm that the surface has received the required contact time before air drying.

For a mincer changeover, the operator should remove the auger, knife and plate, clean each part, clean the housing, then sanitise before switching from raw meat to prepared fillings. For a bandsaw, the blade, guides, table inserts, wheel cover and bone chute need the same controlled treatment, not just a spray across the assembled machine.
This video provides a visual reference for the sequence and equipment handling:
Chemical vs Heat Sanitising for Meat Processing Equipment
A mincer changeover can look clean while fat remains inside the housing, around the plate, or on the auger shaft. Sanitising that residue does not make the equipment safe. Chemical and heat methods both work only after cleaning, and the choice must match the equipment material, surface access, drainage, exposure time, and approved procedure.
For a chemical method, set the dilution and contact time from the product label and site procedure. Chlorine at 100 ppm, QAC at 200 ppm, and peroxyacid at a label-directed concentration are examples used in food environments. Verify concentration with the specified test method. A conveyor that cannot be immersed may suit chemical sanitising, but only after the operator removes the fat film and keeps every required surface visibly wet for the full contact time.
Heat gives a direct control point for removable stainless parts. General food-equipment guidance permits potable water at 75°C for at least 2 minutes, or a label-directed chemical sanitiser followed by air drying. Another recognised heat option is 77°C for 30 seconds. For utensils and implements in meat processing, the AS 4696-aligned benchmark is potable water at no less than 82°C. The approved site procedure must state which method applies. The requirements and operating guidance are set out in FSANZ's cleaning and sanitising appendix.
Heat leaves no chemical residue, but it brings burn, energy, corrosion, and component-damage risks. Chemical sanitiser avoids those heat risks, yet poor dilution, short contact time, or incompatible chemistry can leave ineffective treatment or damage metal. Bandsaw tables and aluminium mincer housings deserve particular care because repeated heat or aggressive chemicals can shorten service life.
For a bandsaw breakdown, heat may suit removable stainless guards and tables, while a chemical method may be more practical for fixed areas that cannot be safely immersed. For a mincer, removable knives, plates, and augers can often receive controlled heat, but seals, housings, and inaccessible joints require the approved chemical process where material compatibility permits.
Decision rule: Use heat when the component can tolerate the required temperature and exposure. Use chemical sanitiser where heat is impractical, then verify pre-cleaning, dilution, contact time, and material compatibility before release.
Disassembly and Reassembly Without Missing the Hard-to-Reach Spots
A bandsaw clean begins with isolation, not a hose. Stop the machine, disconnect the power, apply the site's lockout procedure, and confirm that the blade cannot move. Remove the wheel cover, drop the blade safely, lift the upper guide and remove the table inserts.
The parts then go to a designated cleaning area. Scrub them in a sink using alkaline detergent at the site-approved conditions. The requested working range for this task is 50 to 55°C, but the written procedure and chemical label remain the controlling documents. Rinse each component from the clean side through to the dirty side, rather than pushing residue deeper into a slot or bushing.
Where residue hides
The wheel grooves often hold a dry smear of tissue that is missed because the operator focuses on the blade. The lower blade-guide bushings can trap bone dust. The shoulders of the bone chute collect paste-like residue, and the carcass skid plate can carry material beneath its edges.
Use a narrow brush for grooves and bushings, a larger dedicated brush for the chute and table, and a clean inspection light after rinsing. Non-abrasive tools protect the stainless finish, while excessive pressure on seals and guides can create another maintenance problem.
Once the parts are visibly clean, sanitise them using the approved heat or chemical method. Allow the required exposure, then air dry or use the permitted single-use drying method. Do not reassemble wet components because the shift is running late. Trapped moisture gives residue and contamination a place to persist.
Reassemble as deliberately as you dismantled
Reinstall the table inserts, upper guide, blade, wheel cover and guards in reverse order. Check alignment before returning the machine to service. A blade guard or guide installed crooked can create a micro-slice on the next shift, damaging product and creating a narrow contamination path that nobody notices during a rushed start-up.
Take a photograph of the correctly assembled bandsaw and keep it with the procedure. The image gives relief staff a reference without relying on memory. Apply food-grade oil only after sanitation and inspection are complete, never before cleaning, because oil can spread residue and interfere with detergent contact.
For equipment selection, parts and machine considerations, the meat-processing equipment range provides a useful reference point, but every machine still needs its own dismantling and cleaning instructions.
Building a Cleaning Schedule That Survives a Busy Week
A schedule works when it names the equipment, the timing and the person responsible. “Clean the shop” doesn't tell a new operator whether the mincer has been opened, whether the bandsaw guide has been removed, or whether the sanitiser was checked.
For a small butcher processing 8 to 12 carcases a week, a workable rhythm might look like this:
- Daily, closing shift: The assigned production operator cleans the mincer, bandsaw, knives, cutting tables, scales and food-contact benches. The supervisor checks the high-risk removable parts before sign-off.
- Weekly, Monday morning: The nominated sanitation lead performs the deeper bandsaw strip-down, wall-to-floor scrub and fridge-coil inspection before the busiest production period.
- Monthly, first Monday: The maintenance and sanitation roles coordinate a full bandsaw wheel pull, drain-line foaming and saw-steriliser descaling.
The named role matters. If the duty belongs to “the team”, it often belongs to nobody. A roster should identify the operator, the checker and the action required when a part fails inspection.

High-throughput lines need a different rhythm
An abattoir processing 60 or more head daily can't rely on a small-shop closing routine. CIP loops, conveyor breakdown days and rotating night-shift sanitation crews divide the work across the line. Operators carry out continuous cleaning during production, while the sanitation crew completes full breakdowns during controlled shutdowns.
An 80/20 split between continuous cleaning and full breakdown is a practical operating model for preventing protein accumulation, but it must be treated as a site-designed allocation rather than a universal legal requirement. A short flush removes fresh soil before it hardens. The full breakdown reaches the parts that a running line cannot expose.
Front-load heavy sanitation to Monday morning where the workflow allows it. That protects Friday afternoon productivity without turning the end of the week into a rushed clean that leaves dismantled parts, wet floors and incomplete records.
Verification, Records, and Corrective Actions That Hold Up to Audits
A sanitation log should let another person reconstruct the clean without standing beside the operator. Record the equipment, date, time, responsible operator, detergent dilution, sanitiser concentration, contact time, water temperature, visual result and any deviation.
The record should also show what happened after a failure. If a surface isn't acceptable, stop the release of the equipment, re-clean it, re-sanitise it, inspect it again and record the corrective action. The supervisor should then ask which control failed. Was the mincer opened? Did the detergent dwell long enough? Was the chemical diluted correctly? Did the operator rinse too early?
Use verification to test the procedure
Visual inspection is necessary, but it doesn't prove that every hidden surface is acceptable. A site may use ATP or microbiological swabs as part of its verification programme, with limits defined in the approved food-safety plan and validated for its equipment and products.
| Test | Surface | Pass Threshold | Action if Failed |
|---|---|---|---|
| ATP swab | Food-contact surface | Site-approved limit, such as ATP RLU ≤ 100 where adopted | Re-clean, re-sanitise and re-swab |
| Microbiological swab | Food-contact surface | Site-approved limit, such as TVC < 100 cfu/cm² where adopted | Hold equipment, investigate and repeat cleaning |
| Visual inspection | Mincer housing, bandsaw guides and tables | No visible soil, film or residue | Return to the relevant cleaning step |
| Chemical check | Sanitiser solution | Approved label concentration | Discard, prepare correctly and repeat sanitising |
The ATP RLU ≤ 100 and TVC < 100 cfu/cm² figures are starting benchmarks described in the site procedure, not universal Australian legal thresholds. A responsible programme validates its own limits against the product, surface and testing method.
Auditors commonly want to see training records, chemical safety data sheets, dosing-pump calibration and evidence that corrective actions were closed. Food-safety audit preparation should therefore include the records behind the clean, not just a polished room on inspection day.
A three-month logbook becomes powerful evidence because it shows repetition. It can demonstrate who performed the work, what conditions were used, what failed, and how the site responded. That turns sanitation from a hopeful habit into an organised operating system.
Common Shortcuts That Fail and a Final Sanitation Checklist
Spray-and-wipe fails when blood and fat remain on the surface. The film blocks chemical contact, and the operator records a clean that never removed the soil. Skipping a mincer auger or bandsaw blade guide creates the same problem in a less visible place.
Refilling a sanitiser bucket without dumping the slurry weakens the process as soil accumulates. Dirty cloths spread residue from one table to another. Running hot water below the approved threshold gives the operator warmth, not controlled heat sanitising.
Use this as the floor standard:
- PPE check: Confirm apron, gloves, boots, eye protection and blade-handling protection are suitable.
- Pre-rinse: Remove blood, fat, bone and loose residue without setting protein onto the surface.
- Disassemble: Open the mincer and remove bandsaw blades, guides, inserts and covers.
- Wash: Apply the approved detergent at the correct dilution and dwell time.
- Scrub: Reach grooves, seams, bushings, undersides and chute shoulders.
- Rinse: Remove detergent and loosened soil completely.
- Sanitise: Meet the approved chemical concentration or heat and contact-time requirement.
- Verify: Complete visual checks and any required swab or concentration test.
- Reassemble: Fit guards and guides correctly, then apply food-grade oil only after sanitation.
- Record: Sign the log and document any deviation or corrective action.

If your current procedure says “wash and sanitise” without naming the parts, method, temperature, concentration and contact time, rewrite it before the next shift. Train one operator on the revised checklist, observe a complete mincer changeover and bandsaw breakdown, then make the signed record the standard every operator follows.
Review your current equipment sanitation procedures today, identify the first hidden harborage point your team regularly misses, and update the cleaning schedule with a named operator, measurable control and verification step. Then contact PSC Trading for suitable meat-processing PPE, aprons, sanitisation supplies and equipment support for your butcher shop, commercial kitchen or processing facility.
